


How To Install Your Subfloor
When your bus is once again completely waterproof, and all of your demolition, rust conversion, and repainting has been done you are ready to install a new subfloor in your bus. This is a very exciting time as the inside of your bus will finally start to visually change into something less representing a round metal cage! Briefly I will describe the two typical ways that you can build a subfloor, but in my opinion there is one subfloor solution that is the clear winner.
In building your subfloor the first option is to place 2×3’s on their side on your metal floor in a grid system providing an incredible amount of surface area to screw your plywood subfloor too. You can glue and screw your 2×3 grid to the metal floor of the bus, or you could just glue it or just screw it. You can then cut 1.5” rigid insulating foam board to fit in-between your studs which will sit flush with the top of your 2×3’s. The reason I think this is inferior is that by screwing through your metal subfloor you are now introducing the potential for a small amount of water intrusion at each of those screws. You are also contributing to conductive temperature transfer as the cold metal subfloor conducts through the metal screws. In addition you now have significantly less surface area for proper insulation as your 2×3’s take up a lot of the insulated space and are not effective insulators themselves. The final con is that you are limited to 1.5” of floor insulation unless you stack a second layer of 2×3’s which would allow you to install 3” of insulation.
The alternative is to skip the studs and screws entirely and attach your subfloor solely with an adhesive and I think that is the way to go. To do this you will use an exorbitant amount of the appropriate adhesive (most adhesives will destroy foam board) one of which is Loctite Premium Foamboard Construction Adhesive (although we used Loctite Premium PL which also states it can be used on foam board and it has worked out fine) and glue your foam board to the metal subfloor, and then your plywood subfloor to the foam board all at once. You will need one 28 oz tube of adhesive for each foam board and sheet of plywood, so for a 40 ft bus you will need about 20 tubes of adhesive (so buy them in a case).
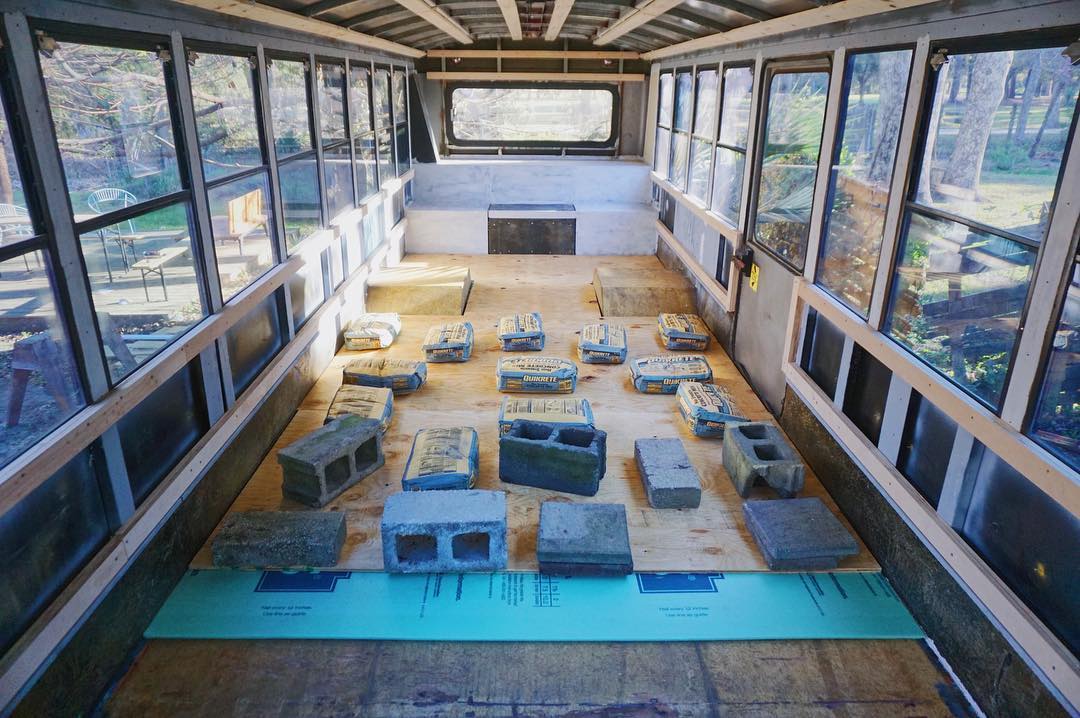
To start, squeeze out your adhesive over a 4’x8’ surface area at the back of your bus and place your foam board in position on the metal subfloor, then squeeze out a tube on top of the foam board and place your plywood on top of it, but cut either the foam board or the plywood short so that your foam board and plywood seems do not line up. You have now created one section of subfloor sandwich. But before you go any further you need to put a significant amount of weight on your floor to keep it tight as the adhesive dries. We used 700 lb’s per sheet of plywood and we used 60 lb bags of concrete, but you can use anything that you have handy or go pick up some concrete or sandbags.
We did this one or two sections at a time (while letting the adhesive dry overnight) and while it is time consuming I believe it is worth the effort. Please refer to *this article* about how to insulate your school bus to help you determine exactly what foam board to purchase for your floor. As far as plywood subfloor options go we chose to use 5/8” CDX which is a fairly rough subfloor material. We chose this product to save money and headspace, but we ended up painting our subfloor and it is rather rough as a result of that decision. We believe the best solution is a 3/4” plywood with an A or B finish on top. This will provide you with an incredibly sturdy floor to drill through and walk on and will allow for the option to paint or finish your subfloor if that’s what you decide in the end. If you choose to follow in our footsteps, regardless of your finished floor covering know that our subfloor is rock solid and doesn’t bounce or move at all. We do not recommend using OSB (Oriented Strand Board) plywood as it is too susceptible to water damage. It will be worth it to pay for a quality subfloor.
2 Comments
Was there a reason you didn’t use foam insulation on the floor?
It’s just a lot easier to use rigid foam board insulation and you get a complete and consistent coverage vs framing out the floor and then spray foaming it.